Hi All,
So at the end of August, I released the Karlie 4 Winter & Spring: Karlie Demonstrates 2013 Winter Trends (Bronzed Contoured Day Look & Vampy Night Look) tutorial. Now it’s the first week of spring, it’s only right to bring out Karlie’s second tutorial, Karlie 4 Winter & Spring: Karlie Demonstrates 2013 Spring Trends (Dewy Highlighted Day Look & Pops of Colour!
I would like to say a quick thank you to Bree and Karlie who gave me some fantastic feedback about the Winter tutorial, it was much appreciated! I love hearing some good feedback about the work of the HTC especially hearing about people really loving the new tutorials and wanting to see more of them (with the right timing and finding the right people to do the tutorials there may be more coming in the future).
About The Studio & Answering The Same Sort Of Questions About Working In A Larger Shoot
These four tutorials were shot back to back at Chris Huzzard’s Studio. I’ve mentioned in the Winter blog that it was my second time working there and the ease of getting to the studio. I recommend google if you want to hear more about the studio or checking out that blog for a rehash of my experiences there and the pros and cons I had towards making previous bookings. I’d like to talk a bit about the shooting style because some people who have been asking to do collaborations lately and want to know about the actual filming process and how it is different from working on a photo shoot. I think it is best to compare the large 50+ person shoot (the charity calendar) to the smaller tutorials and films – I think some people are under the impression what goes on in the larger shoot is what happens/happened in all my shoots – which is a stupid thought because one shoot with 4 people is not the same as one with 50 different personalities or attitudes and is very misleading to tell other people who are interested that’s what happens everytime, some people really… I will try my best to explain it as simply as possible.
Personally I like the smaller shoots the best and they are the closest to what I like when I work. The process is about bringing the models and the MUA together – finding the right team who will go well together on film (not fake so sometimes I get recommended certain models over others or certain models only want to work with one or two certain MUAs). There have been models who have been great on print but just show no personality or any oomph which is needed for film. Usually once the papers about the shoot are handed out the models and MUA feel a lot more comfortable about what is happening and filming goes pretty well.
On the other hand you could have a nightmare shoot like the charity calendar shoot – where there was all this paperwork (everything from the shoot concept, ideas I have for the makeup/hair/styling, what the calendar was about and so on…) for a product which nearly no one (except maybe 5 of the 50 creative members) bothered to read – would they do this to a paying professional or a client? So naturally when someone doesn’t read their job description they throw attitudes around or say a lot of crap which isn’t really helpful or about the shoot. It’s just a big headache when everyone wants to be creative and yay pretty pictures but no one wants to think about the marketing, promotional or printing side of things. I can only work with what I am given and that is shown in the final photo/film.
I guess I am getting at the shoots are about the right people being needed for the shoots. So when you have the right people the filming set is really relaxed and it just feels like a chat with the girlfriends. Some models sometimes have a nap (like Merve) when their makeup is done or some really like to get involved and ask lots of questions about the process (Kelly, Bree or Gurdip). The film sets usually work better if there aren’t any extras who don’t have a filming role – when a photographer comes they usually come towards the end of filming and take pictures here and there. We had one photographer Karen make a simple back garden look like a fancy photo set – it’s really about working with what we have.
If it were a choice of bigger set or smaller set – smaller shoot would win every time! The big shoots I personally ran were fun but I felt my work was desecrated and I have heard little feedback or appreciation for anything that was put together. I hope that very long answer will be enough to please all those questions or rumours I get about shooting on sets and what happens.
Back On-Topic To The Shooting…
Another part of the filming process which I got to do for this set of tutorials was trend research – a lot of people get confused about my role within the filming. Generally the MUA and I go through looks and pick things that work for both of us – the MUA for her portfolio and me because it is something I would be interested in doing or something that a model might bring up which interests me. I do a lot of research and storyboarding between shoots trying to decide what I want to film and the MUA gives me the OK (or we work around any issues) if it matches her vision!
As creative director of the HTC, I think it is important to show viewers (who may not have that expensive budget) how to recreate and film tutorials on a low budget – especially with things like Australians paying more for known makeup brands, who can afford to throw away perfectly usable makeup? Karlie didn’t want the viewers feeling like they had to buy every single product she used (some products aren’t available in Australia like Makeup Forever) – she wanted the viewers to know that it was ok to use your products! She wanted to do these looks where you could easily do these looks at home with your time and your budget and not break it that is important especially if you’re a student or teenager. Four easy looks recreated from trending runway shows and on budget – what more could you ask for?
When I kept on seeing these four looks, it was kind of obvious that was the trend for the season. I also think if you like something do it whenever you want – you don’t need a season to tell you when to wear a certain look or product! These spring trends were showing at M.A.C (just the day before we filmed M.A.C released their spring trend makeup for London) the girls were wearing fruity accessories and neon coloured lipsticks with matching blushes. Even in Australia, the two “high end” department stores, David Jones and Myer were also doing their runway shows and they were very into both the winter (bronzed) and spring (dewy) trends. When I have to tell the models what to bring for shooting, I often research fashion trends or just check out what the models wear when they display the run way looks.
For this tutorial, dewy makeup and neon lips – NEON IS EVERYWHERE! I have noticed clothing is coming out in block (single) colours. Gurdip demonstrated some excellent ways on how she would wear the looks Karlie demonstrated on film for Spring 2013. She came up with some crazy combinations that I wouldn’t have thought about wearing myself.
I wanted to point out to the viewers who are used to MUAs explaining their tutorials, Karlie specifically requested not to speak (and appear minimally) in the videos. Some makeup artists are very shy, get nervous or don’t like being in front of the camera. However, just so her fans and the HTC viewers don’t miss out on anything important Karlie has given me tips throughout the filming session – ones I have written on this blog as I have edited the videos. If there was anything I missed, you’re welcome to contact Karlie directly.
About Gurdip
The model for the Spring 2-in-1 looks was Gurdip, whom I have previously worked with once. What Gurdip lacks in photographic modelling experience, she makes up for with her professional and friendly attitude. I think sometimes other creatives forget that their favourite models started somewhere and didn’t magically appear one day with all the experience in the world. You have to start somewhere if you’re interested in modelling (even as a hobby) right?
Since Gurdip has a very small portfolio I have uploaded some kind of teaser for the charity calendar final images. These ones have been floating about through Craig who has been really put so much effort into getting these images and giving them out to the girls – he has been making his fans guess what the zodiacs were so no spoilers sorry ;( . Although I wish they would show a few manners when they ask me for updates for pictures. I don’t respond very nicely when someone emails me demanding “I want pictures now”. Good pictures take time people and thank you to the creative team and I for getting your images together so quickly would also be appreciated. (The charity calendar teasers come from Craig from Studio Ozone).

After going back to edit Karlie’s tutorials is the different vibes and attitudes from the models. Bree, being the Winter model, was very calm and cool – she was displaying the looks as if she were hanging out with some friends (probably somewhere warm) or going out to some bonfire party and then going glam for some fancy Winter event. The moment Gurdip appears on screen, she is bouncy and energetic (which she was the whole time we filmed) – she is naturally a very smiley person for the last two shoots I have worked with her – always smiling and positive (even when she was sick with the flu too- it’s going around). Gurdip perfectly represented the personality behind the girl who would work Karlie’s Spring looks – she’s fun, flirty and bouncy now the Winter blues are over. I keep saying it, but you have to work with the right model for the looks otherwise it just doesn’t work for any of us on filming day.

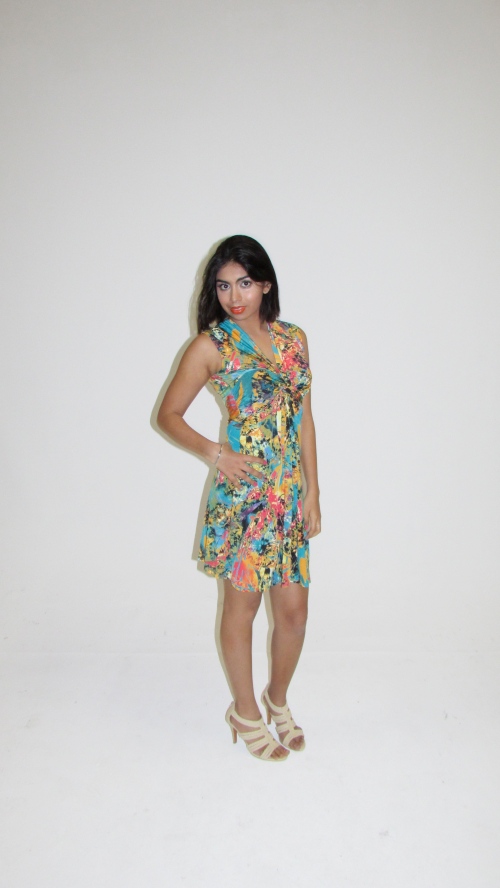
When the models are asked to shoot with the HTC, they are asked to bring outfits they would wear for their theme (so our previous themes have been racing clothing, summer clothing, festival clothing, what they would wear on a date and costumes). While Gurdip didn’t bring as much wardrobe as Bree, she really knows what works for her and what is suitable to be filmed in. Gurdip makes several outfit changes – but this is good because it shows the viewers what different outfits look like with the makeup!

Since this is the last Karlie 4 Winter & Spring blog you can find out more about Gurdip (and some of the other models who have worked with the HTC several times) on the Recommended Models blog.
ABOUT THE LOOK: DEWY SKIN WITH NEON NIGHT LIPS
***
I have noticed some people want to wear the bold night trend, but Karlie is going to demonstrate during the day – if you want to do this, it is up to you. Personally I would prefer to wear the crazy coloured lipsticks at night time – unless you’re in the creative or fashion industry not many bosses would let their employees wear bright lipsticks to work. I also think if you like the tutorial trends Karlie and I did you should rock them whenever you want!
DAY TIME:

The natural skin trend was really big in 2013. Karlie was a big believer in “less is best” when demonstrating looks for day time. This sort of look would be great for working, going out on those romantic spring dates or even eating – because of the natural colours Karlie uses you’re not going to get colourful lipstick all over glasses or whatever your eating. Having lipstick teeth or smeared over your face is embarrassing!
The difference between Gurdip’s look and Bree’s look is this, Bree’s look is very flat and focuses on highlight her cheeks and other features, Gurdip’s look is about giving that glow that comes in spring (even if it is created by makeup). The cream products, which both tutorials use, are utilised in different ways and different textures.
DAY TIME DEWY LOOK – EYES

After priming the entire face and neck, Karlie recommended even though the eyes should be the first thing done for this look. Even though it wasn’t as colourful as the the winter day time look – it would be easier for you to clean up if you did make a mess. Who has time to sit there and constantly redo your makeup (unless you’re a pro and do the same sort of look every day) – not me!
- When working around the lower eyes, they are sensitive and sometimes a brush is too hard – Karlie used her fingers when applying primer to Gurdip’s under eyes.
- Next, Karlie used Real Technique eyeshadow brushes (from the pixiwoo sisters who also do youtube channels) to apply the cream eye primer which she then used a light shade of eyeshadow which was very close to Gurdip’s skin tone – the eyeshadow Karlie used had a shine to it which makes Gurdip look dewy and fresh.
- Because this was meant to be an easy look you could instantly or quickly do – this look didn’t require more than one eyeshadow product. The colour was even spread on the eyelid and not just heavily applied to the one spot.
- For the day time looks (for both winter and spring) Karlie was adamant that the lashies were out for the day – instead Karlie went from the bottom of Gurdip’s lashes to the tip of her eyelashes – because Gurdip has these big bright eyes and brows she didn’t really need much makeup in these areas for the day time. Seriously Gurdip is like Bambi.
DAY TIME DEWY SPRING SKIN
So after the eyes are finished, Karlie next worked on foundation – this was the key step to getting this look right.
- When Karlie applied the foundation she placed the product (Makeup Forever HD foundation) on the back of her hand – she blended the product into the brush (Real Techniques) and blended using circle motions onto Gurdip’s face. Gurdip’s makeup was meant to look fresh and bright rather than flat/matte This has to be done really well or else the rest of the foundation is just going to look like crap.
- After foundation was properly blended on ‘s face, and on her neck, it was time to use a cream concealer (Makeup Forever HD Concealer). Karlie really focused on this area for Gurdip, making sure the concealer blended in well – for spring looks they are fresh and bright and this look is creating that “glow” even if you don’t feel like you have one. Covering up any red noses or tired eyes from the winter flu are a must!
- To put SOME colour back in – we didn’t want Gurdip to look pale and ghastly – Karlie used a Stila palette with three bronzing and cheek colours which she used to set Gurdip’s foundation but also to give some depth and highlight in Gurdip’s facial features like her cheeks. Karlie used a “3” shape – so the top of Gurdip’s forehead, the middle of her cheeks (with blush) followed by product on her neck and chin.
- The blush Karlie used came from a multi-colour palette, so Karlie mixed a pink and deep peach together after lighting adding bronzer to Gurdip’s day base.
- Karlie, using a spoolie quickly ran through Gurdip’s brows and left them untouched for the tutorial. If you have those thick brows which are neatly groomed and full of colour then you don’t really have to do this step. If you colour and groom then this step is recommended.
- Finally Karlie remembered to add highlighting product just above the middle “3” part of Gurdip’s blush and bronzer just to add that textured glow -really showing off Gurdip’s cheeks where the sun hits her face. This “3” contouring technique was brought up in Bree’s winter tutorial.

DAY TIME DEWY LOOK – LIPS
After the harsh and drying winters in Australia- moisture is a key thing to getting that spring glow. Regardless of how many products, you put on your face or lips, without looking after the base (your face) the products just won’t sit right. Lucky these colours are natural and easy to apply, so it’s ok to go eat and drink without worrying about your colours staining on glasses or whatever your lips happen to go on.
- Karlie heavily moisturised Gurdip’s lips before filling them in with a natural lip pencil.
- After filling in the lips (all of them) Karlie added a simple gloss – which was brown-orange in tone to finish Gurdip’s day makeup.
NIGHT TIME: NEON LIPS

Karlie had a tough time picking which colours to use on Gurdip for her neon lips. Gurdip is very lucky that she has the perfect skin tone to get away with any crazy bright colours she wanted to – something a paler model like Bree would not be so lucky to get away with. Karlie’s original choice was going to be neon pink but she ended up changing her mind to neon orange once she saw Gurdip’s evening outfit (a green-white-orange dress).
Some runway shows like M.A.C and Betsey Johnson were trending “neon ombre lips” – this means the outside of the lips were bright pink but the centre of the lips could be orange. Another version I have seen of this trend, which I have noticed with Korean Uzzlangs on youtube, but the Uzzlangs use lighter colours for their lip ombre.

NEON NIGHT LOOK – EYES

This look was super easy to film but also to apply – with someone who might be coming to a party after work, you could easily swap your lipstick over and add the false lashes – if you can’t live without them.
- Karlie used individual lashes on Gurdip, who wasn’t comfortable with wearing a full set (Karlie used demi or half sets of lashes for Bree but this was about showing people other options that meant they COULD still wear lashes).
- She applied a glue and used tweezers to individually place long to mid-length lashes across Gurdip’s eye. It wasn’t about using a whole packet of fake lashes but picking places where they would BLEND in -making it look like Gurdip naturally had these long luscious lashes (than she already has…because they are pretty long and crazy in a good way).
- Karlie also uses a really cool techinque for drying lashes – she picks up a paper fan and really makes sure they are dry (and tugs gently to check this) before she moves on with the next step.
NEON NIGHT LOOK – LIPS


Finally, lips! Like Gurdip you could make a quick outfit change from your day time activities to swap over your look for night time. Karlie had a had time deciding what colours she wanted to use on Gurdip. After seeing the dress and shirt Gurdip brought in for filming – she chose bright orange over bright pink.
- Karlie quickly took off the brown-orange gloss she used for the day time look and started filling in Gurdip’s lips with a bright orange pencil.
- After filling in the lips (all of them) Karlie started to apply lipstick from a brush to get an evenly applied orange tone to Gurdip’s lips. Once this was done this night look was instantly completed.
Once Gurdip had her full night time makeup, I couldn’t help but notice she looked a lot like the singer M.I.A – what do you think?


Singer M.I.A
Here are the products Karlie used for this tutorial (some of these products aren’t available in Australia):
- Makeup Forever HD Primer
- Makeup Forever HD Foundation
- Napoleon Quad Palette
- Real Techniques eye shadow brush
- Makeup Forever concealer
- Jordana Mascara
- Real Techniques blush brush
- Makeup Forever concealer (cream palette)
- Makeup Forever blush
- Orange lipstick Sportsgirl
- Orange lip liner
To contact Karlie just click this link to be taken to her facebook business page (she has been a bit busy at the moment so just be patient for contact).


Enjoy recreating her looks!


You must be logged in to post a comment.